Meal-prepped burritos sound simple until you pull one from the freezer and bite into a soggy tortilla wrapped around a flavourless filling. Knowing how to meal prep burritos in 2026 means understanding that texture and moisture are the real challenges, not just cooking in bulk. Get those two things right and you have a week’s worth of satisfying, healthy meals ready to grab on the busiest mornings or evenings. This guide covers everything: the right tools, the best fillings, wrapping technique, freezing, reheating, and creative variations that actually taste good days later.
Table of Contents
- Key takeaways
- How to meal prep burritos in 2026: getting started right
- Assembling your burritos step by step
- Freezing, storing, and reheating like a pro
- Common mistakes and how to avoid them
- Creative and healthy burrito meal prep ideas
- What I have learned from years of prepping burritos
- Burrito Splendido and your meal prep journey
- FAQ
Key takeaways
| Point | Details |
|---|---|
| Moisture control is everything | Exclude raw tomato, sour cream, and guacamole from burritos before freezing to prevent soggy tortillas. |
| Follow the one-cup rule | Use roughly 1 cup of filling per 10-inch tortilla for a tight roll that holds its shape. |
| Cool before you wrap | Let fillings reach room temperature before assembly to stop steam from ruining the tortilla. |
| Flash freeze individually | Lay burritos on a baking sheet before bagging so they freeze separately and keep their shape. |
| Two-stage reheating wins | Microwave at 50% power, then finish in a skillet or air fryer for a tortilla that is warm and slightly crisp. |
How to meal prep burritos in 2026: getting started right
Before you roll a single burrito, you need the right foundation. Skipping this step is why most meal prep burritos disappoint. A 10-inch flour tortilla is the standard for good reason. It is large enough to hold a full portion, pliable enough to roll tightly, and sturdy enough to survive freezing and reheating without cracking.
Here is what you need before you begin:
- Tortillas: 10-inch flour tortillas (look for ones with minimal additives)
- Proteins: cooked and seasoned chicken, beef, pork carnitas, black beans, or scrambled eggs
- Sturdy carbs: roasted potatoes, cooked brown rice, or seasoned quinoa
- Cheese: shredded cheddar or Monterey Jack (Bothwell Cheese from Manitoba is an excellent local option)
- Tools: large skillet, baking sheet, parchment paper, aluminium foil, airtight freezer bags or containers
| Item | Why it matters |
|---|---|
| 10-inch flour tortilla | Ideal size for portioning and rolling without tearing |
| Cooked, cooled protein | Prevents steam buildup inside the wrapped burrito |
| Roasted potatoes or rice | Absorbs moisture and adds substance |
| Shredded cheese | Melts into filling, acts as a slight moisture barrier |
| Airtight freezer bags | Prevents freezer burn over 2 to 3 months of storage |
Sturdy ingredients like roasted potatoes, well-cooked beans, and browned proteins are the backbone of any burrito that holds up in the freezer. The golden rule on portioning: about 1 cup of filling per 10-inch tortilla keeps the roll tight and prevents structural failure.
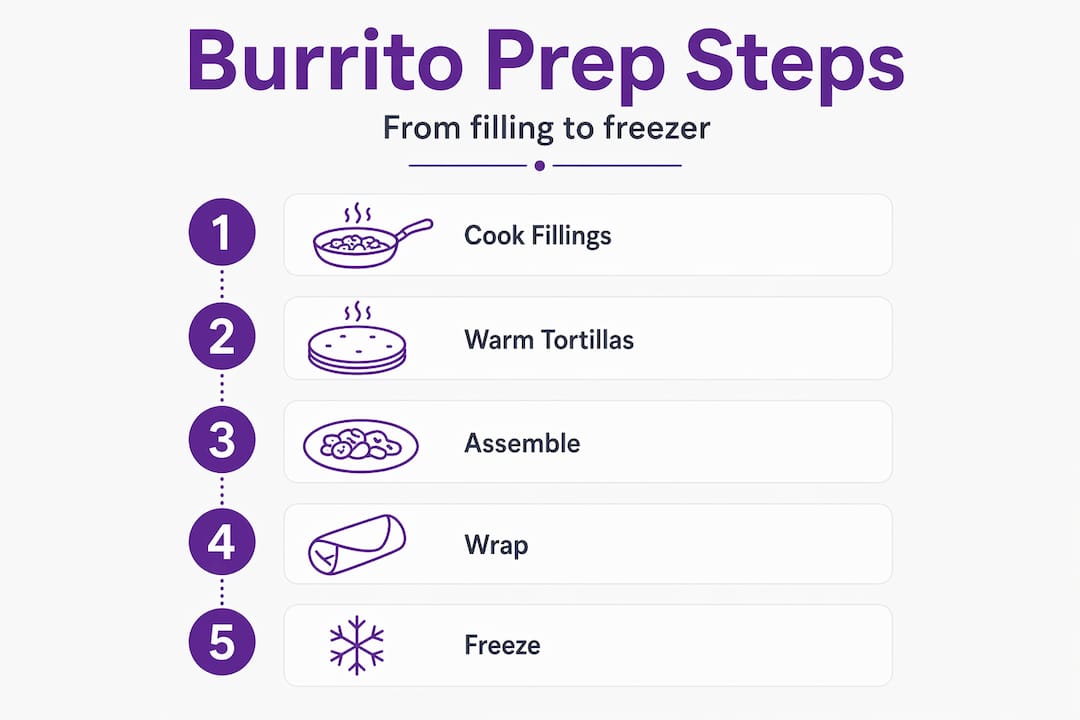
Pro Tip: Warm your tortillas for 20 to 30 seconds in a dry skillet before filling. A pliable tortilla rolls without cracking and seals far more securely than a cold one straight from the bag.
Assembling your burritos step by step
Once your fillings are prepped, assembly is where the real technique lives. Follow this order closely and you will avoid the most common problems that plague make ahead burritos.
-
Cook your protein with moisture in mind. Whether you are using chicken, ground beef, or carnitas, cook off as much liquid as possible. Excess water from eggs and vegetables is one of the primary causes of tortilla failure during freezing and reheating. Cook scrambled eggs low and slow until just set, not wet.
-
Roast or sauté your vegetables until dry. Peppers, onions, and mushrooms release a surprising amount of water. Spread them on a hot pan with space between them, not crowded, so they caramelise rather than steam.
-
Cool everything completely. This step is non-negotiable. Cool filling to room temperature before you touch a tortilla. Hot filling creates steam inside the wrap, which softens the tortilla and leads to that dreaded mushy texture after freezing.
-
Layer your fillings strategically. Start with a base of rice or roasted potatoes, then add protein, then cheese. Cheese placed between warm fillings and the tortilla acts as a slight moisture shield. Keep salsa out entirely. It is a fresh topping, not a burrito filling when you are prepping for the freezer.
-
Portion carefully. One cup of filling, no more. Overfilling makes rolling nearly impossible without tearing and leaves you with burritos that burst open in the freezer or fall apart when reheated.
-
Roll tightly. Fold the sides in first, then roll from the bottom up, keeping tension throughout. A loose roll traps air and leads to uneven freezing.
-
Wrap immediately. Roll each burrito tightly in a sheet of parchment paper first, then wrap in aluminium foil. This double wrap protects against freezer burn and keeps the shape intact.
-
Flash freeze before bagging. Lay the wrapped burritos on a baking sheet in a single layer and freeze for one to two hours. Flash freezing individually prevents them from sticking together and preserves their shape before you transfer them into a freezer bag.
Pro Tip: Label every burrito with the filling type and the date. After two months in the freezer, all burritos look identical. Knowing what is inside saves you from a surprise breakfast burrito at dinner.
Freezing, storing, and reheating like a pro
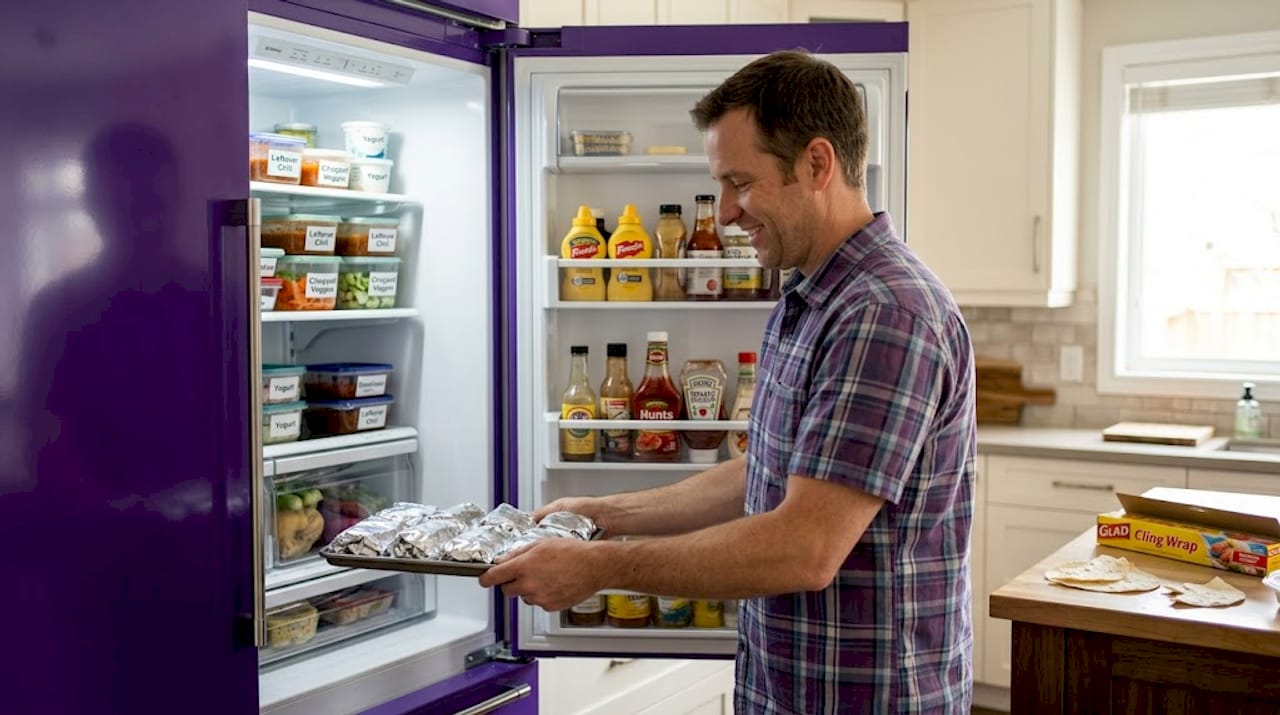
Getting burritos into the freezer correctly is only half the job. How you store and reheat them determines whether they taste fresh or flat.
On storage timelines, the numbers are clear:
- Refrigerator: Up to 3 to 4 days for fully assembled burritos. Beyond that, texture degrades noticeably.
- Freezer: 2 to 3 months for best quality. They are technically safe beyond that, but flavour and texture both suffer.
For reheating, the two-stage method is the approach that actually preserves texture. Microwave at 50% power for 2 to 3 minutes, then transfer to a hot skillet or air fryer for 1 to 2 minutes to crisp the outside. This balances thorough warming with tortilla texture preservation instead of producing a rubbery, uneven result.
Always reheat burritos until the internal temperature reaches 165°F (74°C) for food safety. A meat thermometer takes five seconds and removes all guesswork.
If you have time, thaw the burrito overnight in the fridge before reheating. It cuts microwave time in half and produces a more evenly warmed result from edge to centre. For a crispier finish, unwrap the foil before the skillet or air fryer step and let the tortilla make direct contact with the heat.
Common mistakes and how to avoid them
Even experienced home cooks run into the same burrito prep problems. Here are the most frequent ones and how to solve them before they cost you a batch.
- Wrapping hot fillings. Steam trapped inside the tortilla is the single biggest cause of soggy burritos. Always cool fully first.
- Adding high-moisture ingredients before freezing. Raw tomato, sour cream, and guacamole damage tortilla integrity from the inside during freezing. Save them as fresh toppings after reheating.
- Overfilling. More than one cup of filling creates tears during rolling and uneven freezing. You will get better results from a tightly packed, properly portioned burrito.
- Skipping the flash freeze. Putting assembled burritos straight into a bag causes them to freeze into a clump. Flash freezing individually takes two hours and saves the entire batch.
- Reheating at full microwave power. Full power creates hot spots and a rubbery tortilla. Drop to 50% and give it time.
Pro Tip: If you want maximum freshness without full assembly, try component-based prep. Store your proteins, rice, beans, and toppings separately in the fridge and assemble fresh each day. It takes about three minutes per meal and produces a noticeably better texture, though it works best for a 3 to 4 day fridge rotation rather than long-term freezer prep.
Creative and healthy burrito meal prep ideas
Once you have the technique down, the real fun begins. Budget-friendly burrito meal prep does not mean boring. Here are some filling combinations and ideas worth trying:
- High-protein breakfast burrito: Scrambled eggs, black beans, shredded Bothwell cheddar, and diced roasted potatoes. Add hot sauce after reheating.
- Adobo chicken and rice: Slow-cooked adobo chicken (similar to what Burritosplendido makes in-house), brown rice, sautéed peppers, and corn. No sauce inside before freezing.
- Plant-based option: Spiced black beans and lentils, roasted sweet potato, wilted spinach, and a layer of shredded cheese or a dairy-free alternative. Explore a full vegan burrito guide for more ideas.
- Paleo-friendly wrap: Slow-cooked pulled pork or beef barbacoa with cauliflower rice and roasted vegetables. If you follow paleo guidelines, the paleo burrito options guide is worth bookmarking.
- Manitoba-inspired filling: Use locally sourced pork, Peak of the Market seasonal vegetables, and Bothwell cheese for a burrito that is genuinely rooted in Canadian ingredients.
Season your fillings with cumin, smoked paprika, garlic powder, and oregano. These spices survive freezing without turning bitter or fading, unlike fresh herbs which lose most of their punch. Fresh cilantro, lime juice, sour cream, and salsa all belong on top after reheating, not sealed inside.
What I have learned from years of prepping burritos
I have made hundreds of batches of meal prep burritos and the lesson that took me the longest to accept was this: patience in the cooling step is not optional. Every time I rushed it, I paid for it with a soggy, mediocre burrito three days later. The instinct is to move quickly because batch cooking feels like a race. Resist that instinct completely.
The other thing I have changed my view on is the idea that a fully assembled frozen burrito is always superior to component prep. It is not. For a week’s worth of breakfasts? Fully assembled and frozen wins on convenience. For lunch burritos where you actually care about the texture of the tortilla? Storing components separately and assembling fresh produces a noticeably better result. Both approaches belong in your rotation.
My favourite reheating method is the air fryer at 175°C for five to six minutes from frozen, with no microwave at all when I have the time. The tortilla crisps beautifully and the filling heats through more evenly than most people expect. The microwave-first method is faster, but the air fryer finish is worth the extra few minutes when the result matters.
The most surprising thing I discovered is how much cheese matters structurally. A thin layer of shredded cheese between the filling and the tortilla acts as a natural barrier that slows moisture migration. It is not just about flavour.
— Austin
Burrito Splendido and your meal prep journey

If you love the idea of fresh, locally sourced burrito fillings but do not always have the time to prep everything from scratch, Burritosplendido has you covered. The team at Burritosplendido uses Manitoba-grown ingredients, slow-cooked proteins, and house-pressed tortillas to build burritos that reflect the same values you bring to your home prep. Their catering services are a practical option for anyone who wants fresh, customisable burrito bowls and wraps for meal planning on a larger scale. Whether you are building your own batch at home using authentic Canadian ingredients or letting the Burritosplendido kitchen handle a week’s worth of fresh meals, the commitment to quality and local sourcing stays the same. Visit burritosplendido.com to explore the full menu and catering options.
FAQ
How long do meal-prepped burritos last in the freezer?
Meal prep burritos maintain their best quality for 2 to 3 months when stored in the freezer in airtight wrapping. In the refrigerator, fully assembled burritos keep well for 3 to 4 days.
What fillings should I avoid when freezing burritos?
Avoid raw tomato, sour cream, guacamole, and fresh salsa inside burritos before freezing. These high-moisture ingredients degrade the tortilla from the inside and should be added fresh after reheating.
What is the best way to reheat a frozen burrito?
Microwave at 50% power for 2 to 3 minutes, then transfer to a hot skillet or air fryer for 1 to 2 minutes. Always reheat until the internal temperature reaches 165°F (74°C) for food safety.
Can I meal prep burritos without a freezer?
Yes. Assemble fully and refrigerate for up to 4 days, or use component-based prep where you store proteins, grains, and toppings separately and assemble fresh each day. The component method produces the best texture for fridge-only meal planning.
How do I stop my burritos from getting soggy?
Cool all fillings to room temperature before wrapping, exclude high-moisture ingredients from the filling itself, portion to about 1 cup per tortilla, and flash freeze burritos individually before bagging.